- Model: VK-FTL-OS
- Labeling precision: ±1mm (Errors of products and labels are not included.) and adjustment level will influence labeling precision obviously;
- Labeling speed: 20~45 pcs/min (related with product label dimensions).
- Applicable product: containers provided by customer.
- Applicable label: rolled label provided by customer.
- Machine dimension: 2250×1310×1520mm (length×width×height).
- Applicable power: 220ACV 50/60HZ.
- Weight: 350KG
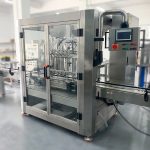
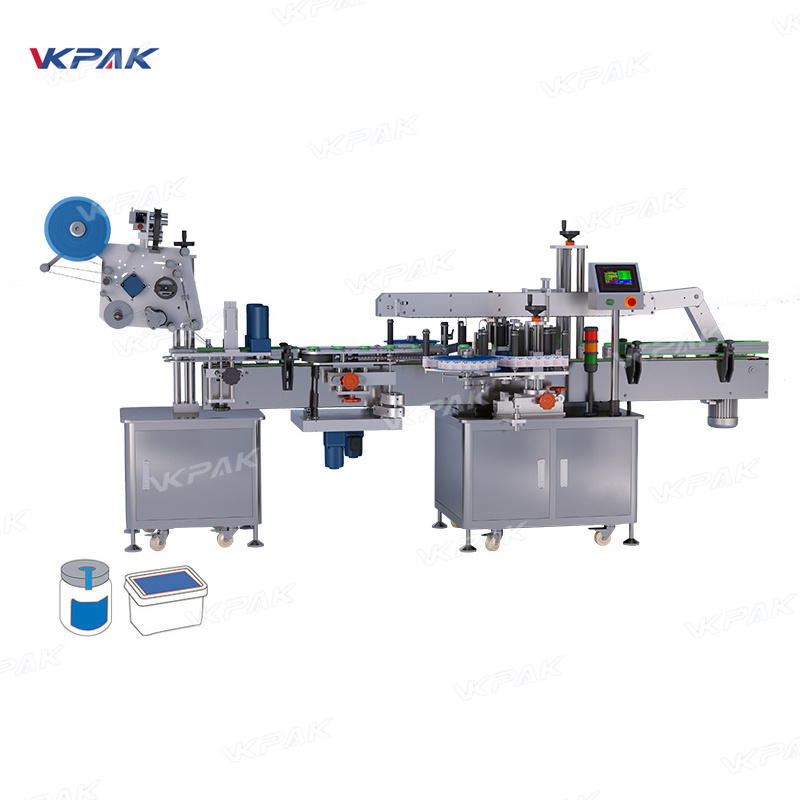
The two heads labeller machine is applicable for the lids and bottles jars labeling and packaging,which should meet the requirements given below:
Machine Application
1. Specially attach the cover (requires front-end lower cover system rear-end cover system, the cover is the kind that is sunken, see the picture on the right)
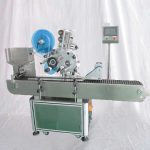
2. Round bottle top labeling bottle body labeling (requirements A. Equipped with bottle feeding carousel bottle closing carousel B. The machine needs to be enlarged to adapt to the bottle diameter of 30mm-160mm)
3. Specially applied to round bottles.
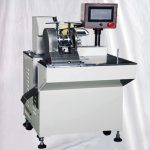
4. The machine needs to be equipped with a coding machine
5. The size of the customer's elevator is 1.75*1.1m and needs to be dismantled to provide guidance for entering the elevator.
Machine Basic Parameters

- Labeling precision: ±1mm (Errors of products and labels are not included.) and adjustment level will influence labeling precision obviously;
- Labeling speed: 20~45 pcs/min (related with product label dimensions).
- Applicable product: containers provided by customer.
- Applicable label: rolled label provided by customer.
- Machine dimension: 2250×1310×1520mm (length×width×height).
- Applicable power: 220ACV 50/60HZ.
- Weight: 350KG
What Is The Labeling Machine:
The labeler machine is a device for attaching a roll of self-adhesive paper label or other suitable material to a product or a prescribed package,which is widely used in various industries such as electronics, furniture, beverage, daily chemical, food, medicine, petrochemical, etc.
Labeling of product packaging containers and packaging boxes. Automatic labeling machine equipment plays an important role in various industries. The machine's own structure is perfect, and the all stainless-steel material makes it easier to store and prevent equipment from getting wet and rusting.
The principle of the labeling machine is that the item is fed to the labeling working station at a constant speed on the conveyor. The mechanical fixture separates the items a fixed distance and pushes the item in the direction of the conveyor.
It has a drive wheel, a labeling wheel and a reel. The drive wheel intermittently drags the label strip movement such that the label strip is pulled out of the spool while the label strip is pressed against the article by the labeler wheel. An open-loop displacement control is used on the reel to maintain the tension of the label strips
because the label strips are connected to each other. The label belt is continuously stopped and stopped so that the label tape is attached to the article with the labeling wheel moving at the same speed as the article. When the conveyor reaches a certain position, the label drive wheel accelerates to the speed at which the belt matches. And after the label is attached, it decelerates to a stop.
Since the label may slip slightly, it has a mark on it to ensure that each label is placed correctly, which is read by a optical sensor. During the deceleration phase of the label, the drive wheel will re-adjust the position to correct any errors on the label.
Bottles And Lids Samples
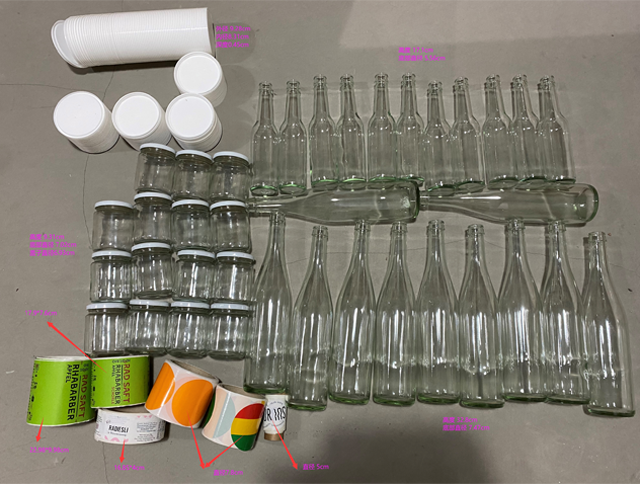
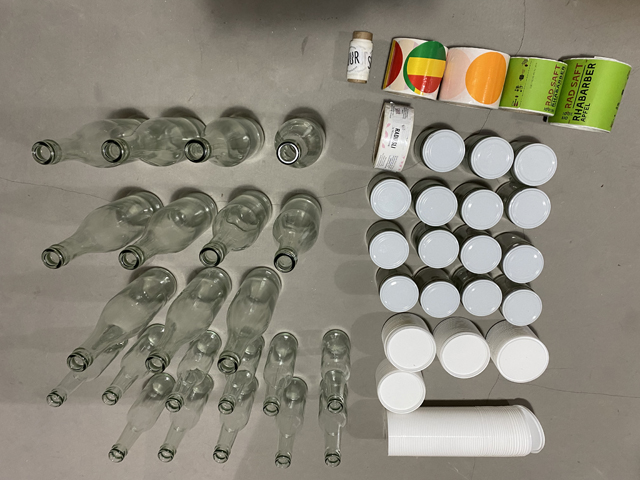
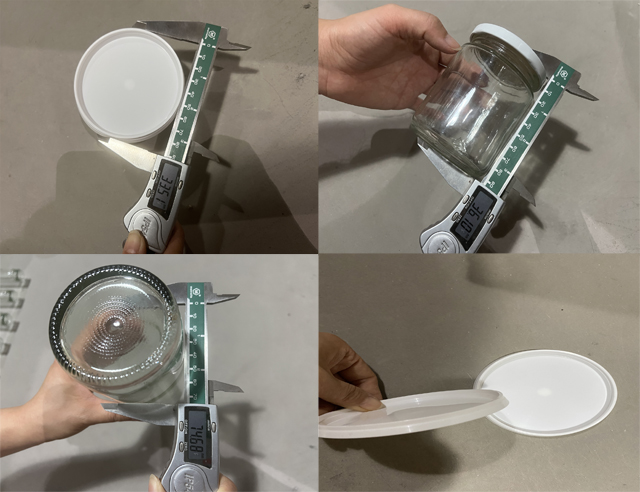
Sample size (see actual sample for details)
1. Jar diameter 70mm, height 96mm (top label diameter 55mm. bottle label 160*40mm)
2. Bottle No. 1, diameter 70mm, height 330mm, label 230*106mm
3. Bottle No. 2, diameter 50mm, height 230mm, bottle label 170*70mm
Instruction Manual
Part I Statement
I. Regular Items
This labeling machine is non-standard equipment and needs certain techniques to operate it. Or the high efficiency or normal use of the machine will be affected. The operation of this labeling machine must be complemented by a trained technician.
The operations of this equipment should be accord with the instruction manual or under the instructions from the technicians from our company. This instruction manual is applied to VK-FRL-OS labeling machine (Abbreviation is labeling machine in the following sections.). The purpose is to ensure the normal use and adjustment of this machine.
II. Company Rights
This equipment is developed and manufactured by Our company. Our Company reserves the following authorities:
In order to maintain the technical advantages and applicability of the machine, our company can update mechanical parts, electro-control components and software, including the structure, type and brand of the components used, but free updates for the machines already sold are not promised.
Our company has the rights to require that the machine being kept integrally. Without the technical instructions from the technicians from our company, the modifications to the mechanical, electrical or control parts are not allowed. Or the related damages should be paid by the party which violated the rule.
Our company provides related technical instructions for adding code or other functions based on this machine, but not responsible for the related components.
The intellectual property right of this machine and this instruction manual is belonging to our company. Any plagiarism must bear legal liability
III. Safety Items
Danger! Make sure the machine in operation is earthed to the ground to prevent electrical shock.
Danger! Make sure the voltage is not overloaded.
Warning! The operations to the electrical boxes and circuits should be under the instructions from electrical technicians or professional personnel.
Warning! Pay attention to the rotating parts to prevent compression crush.
IV. Operation Rights
Make sure operation, location and maintenance of this machine must be performed by trained and authorized personnel.
Only allow certified or professional personnel and equipment engineer to accomplish the layout.
Operation to the machine needs to make sure:
- Operator is trained professionally and certified by our company.
- Operator has the knowledge to repair or deal with basic malfunctions during the process of the machine operation.
- Work according to the requirements in this manual in the operation to this machine.
V. Operation Environment
Do not use under following circumstances:
- Severe temperature variation.
- Humidity or high moisture.
- Intensely vibration and shock
- Too much dust
- Water, oil and chemicals spray
- Explosive, flammable, and dangerous things
VI. Tune-in Period
This labeling machine is made based on customer’s products specifically and is not standard equipment, has technical and experience requirements to operators, and needs one month duration to tune in. In tune in period, if the technical parameters are not achieved in equipment operations, feedback to our company to get technical support.
Part Two Machine Introduction
I. Basic Function:
This labeling machine is specifically designed, has the characteristic of uniqueness and is used for labeling on circumference and top of the cylinder or on assigned position (labeling on assigned position needs to add accessories). When getting familiar with the machine, the machine can be also used for labeling on round container in other industries, such as canned food, round container for tinned food, cosmetics, medicine and so on.
II. Label Recovering Process Description:
Place container →separate container→ conveyor→ product detection→ Label recovering→ Collect container.
- Place product on the transportation belt.
- Container separating mechanism separates the containers in certain distance.
- Under the dragging of the transportation belt, the container runs to the right side of the labeling mechanism automatically.
- Container comes to the detected position and be detected by the electrical sensor which will feedback signals to PLC.
- Traction motor rotates, sends out and pastes label on the product.
- Labeling recovering mechanism twists and rolls label on the container.
- Containers are transported and collected in the collecting container.
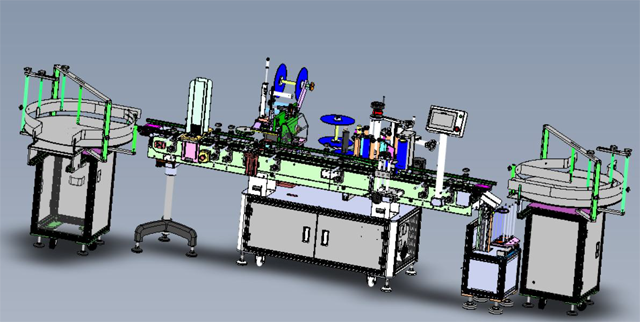
Part Three Mechanism
I. Overall View
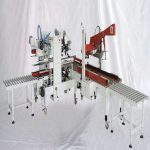
Mechanical structures and functions of each part are indicated in following picture: [Equipment 3D Model]
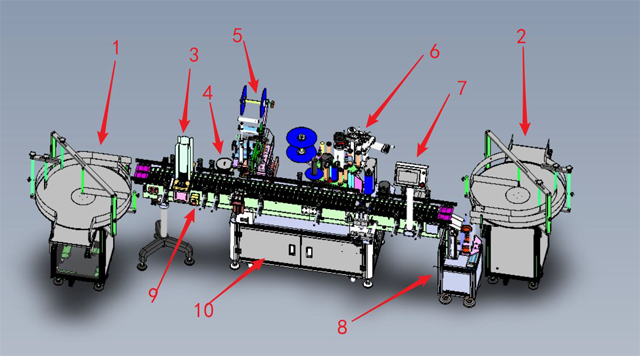
- Feeding and bottle handling mechanism: conveying products to and its conveying line.
- Bottle receiving mechanism: receiving and sorting the processed products.
- Dividing mechanism: dividing and labeling disk materials.
- The bottle separating mechanism separates the round bottle products and opens the distance.
- 1# head to label the upper plane of the product.
- 2# head to label the side of the product.
- Display screen for human-computer interaction.
- The receiving mechanism receives the disc products.
- Power supply emergency stop: press the button and the equipment will be powered off for emergency stop.
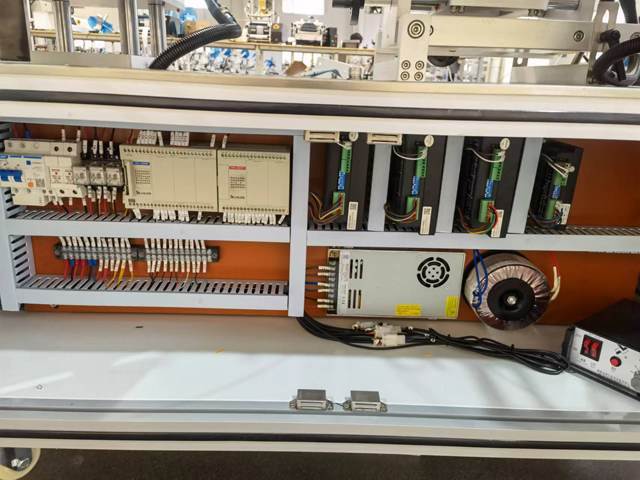
- Installation position of electric box and equipment circuit part.
II. Details View

1. [Labeling Head]
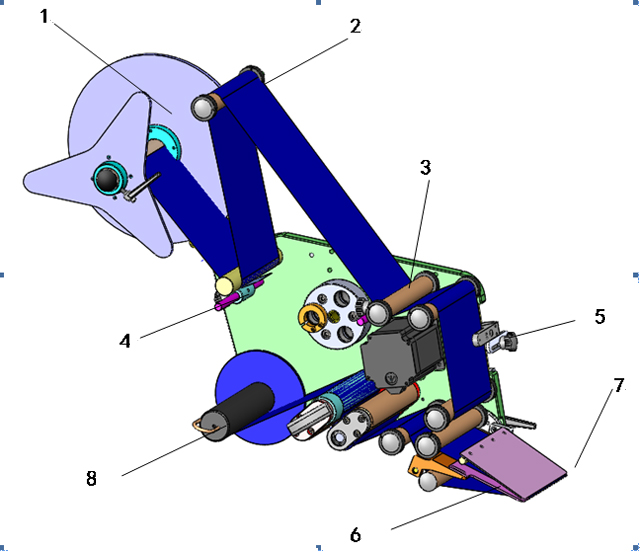
- Material placing mechanism: used to put label in rolls.
- Brake: used to stop labels to keep label from loose and keep the tension force of the belt.
- Roller: wind labels to keep tension force of the label.
- Press mechanism: press label tightly.
- Electric sensor frame: install label identification electric sensor and move it forth and back.
- Dispenser board: spilt label.
- Traction mechanism: drag base paper of the label strip, and provide power to split label.
- Material collecting mechanism: recycle the label base paper.
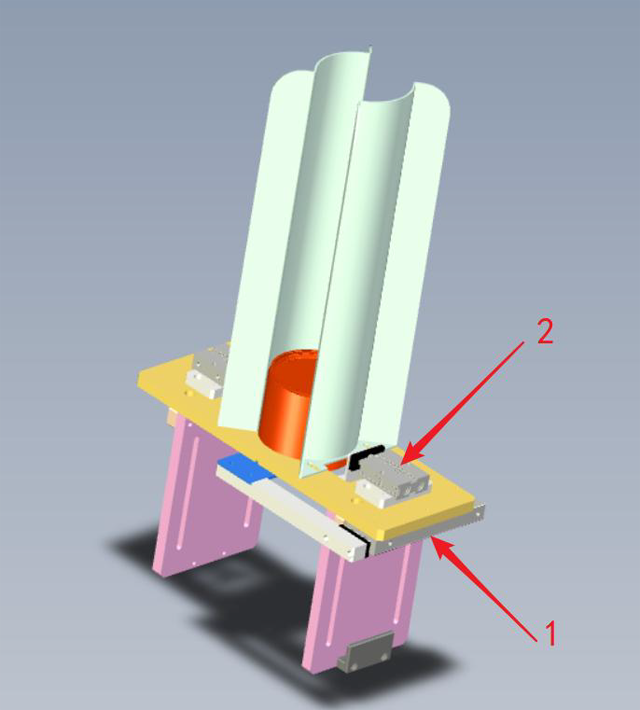
2. Product detection electric sensor frame
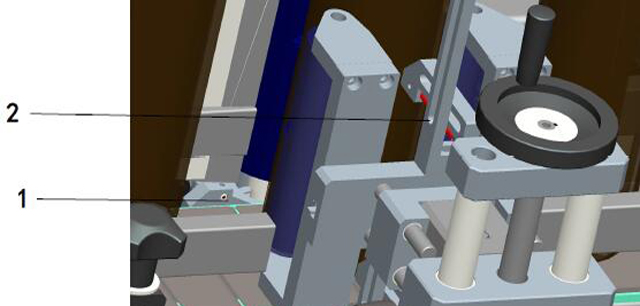
- Product detection electric sensor: direct correlation optical fibers: one emits signals, and the other optical fiber receives signals. Detect objects existing or not by partition of the signals.
- Positioning electric sensor: diffused reflection optical fiber, to position the labeling, to detect the existence of the product by the changes of the diffused reflection.
3. Adjustment mechanism:
Adjust all adjustment mechanism. Related locking screws must be loosed first. Tighten locking screws after adjustment to keep fixation.
- Forward and backward adjustment lever: adjust the labeling head forward and backward with the end of hand wheel.
- Left and right adjustment lever: adjust the position of the labeling head left and right with the end of hand wheel.
- Left and right inclination adjustment: adjust parallelism between labeling head and transportation belt by the hand wheel.
- Forward and backward inclination adjustment: adjust parallelism between labeling head and transportation belt by the hand wheel.
- Up and down adjustment: adjust labeling head up and down by the hand wheel on the top.
- Label identification electric sensor adjustment: release the 5-start wheel to the position the electric sensor left and right and up and down.
- Dispenser board angle adjustment: swing the angle of the dispenser board by loosening relative positioning screws.
4. Positioning Mechanism
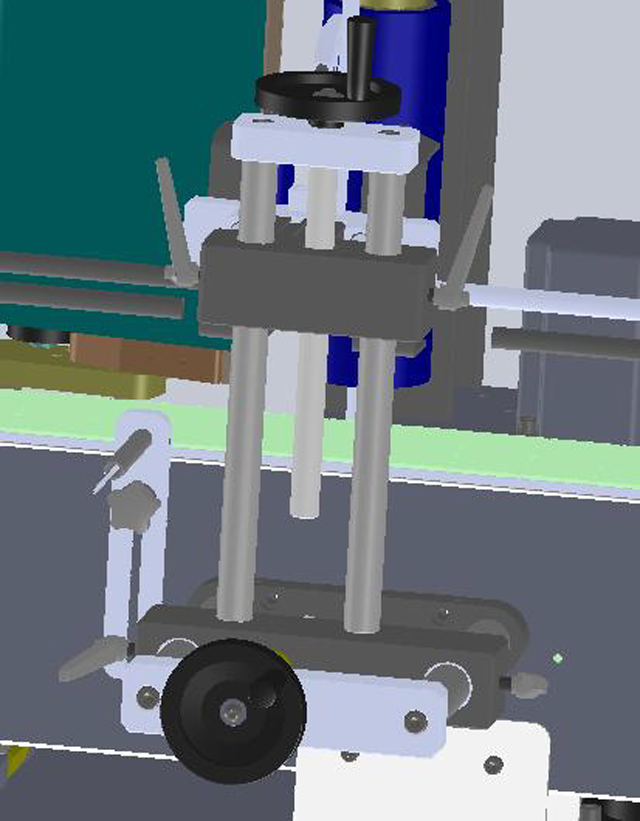
- Forward and backward adjustment: adjust the positioning mechanism forward and backward by adjusting the hand wheel on the top.
- Up and down adjustment: adjust the positioning mechanism up and down by adjusting the hand wheel on the top.
5. Label Recovering Mechanism

Inclination adjustment: screw out (screw in) the 2 screws at the front and screw in (screw out) the 2 screws at the back to adjust the angle between label recovering mechanism and transportation belt.
6. Distributing Mechanism
- Distributing and discharging cylinder: responsible for discharging the products inside the hopper one by one
- Material distribution clamping cylinder: be responsible for clamping other products when the material is discharged by the discharge cylinder.
Part Four Electrical Part
I. Electrical Control Principle:
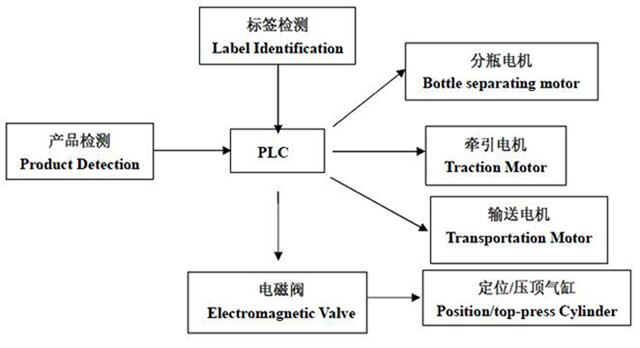
Input signals are product detection signal, labeling detection and label identification signal, after processed in PLC, output signal is the control signals of traction motor and electromagnetic valve to control the flex of the controlling cylinder and traction motor, to finish the positioning labeling of the products.
Part Five Adjustment
I. Mechanical Adjustment
1. Guiding Mechanism:
Adjust orientation mechanism. Move guiding block forth and back according the size of the products to assure that the products will not go to the wrong direction in transportation. Adjust to let products go through smoothly and it is well that the misalignment on the 2 sides within 0.5mm.
2. Recovering Mechanism:
Adjust the recovering mechanism to make the rubber wheel parallel with the product, which ensure that the stress on product is even, recovering wheel can touch the label and labeling position is stable.
3. Labeling head:
Related lock screw must be loosed first for each adjustment. Tighten lock screw after adjustment. Adjust up and down, forth and back by hand wheels. Could be adjusted parallel or rotationally to implement the adjustment of the labeling position.
4. Label dispenser board:
Adjust label dispenser board, loose the 7 shape handle on the connection mechanism of it, and swing label dispenser board for a certain angle to match with the product needs. Maybe need to adjust the angle for smooth label splitting for labels with different thickness and materials.
II. Electric Sensor Adjustment
The machine has 2 sets of electric sensors: product detection electric sensor and label identification electric sensor which can be adjusted according to the needs of product detection and label identification.
1. Position Adjustment:
Adjust electric sensor frame forth and back or up and down to adapt different products and labels. Adjustment methods refer to mechanical introduction section.
2. Electric eye setup:
The original electric sensor is MT groove electric sensor. Other label identification or product detection electric eyes are optional.
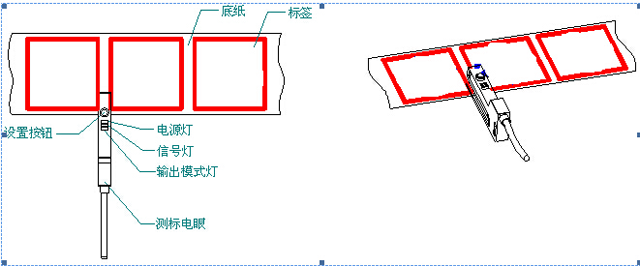
2.1 Label identification electric sensor: to detect labels (Only as model introduction, don’t represent real type of this machine)
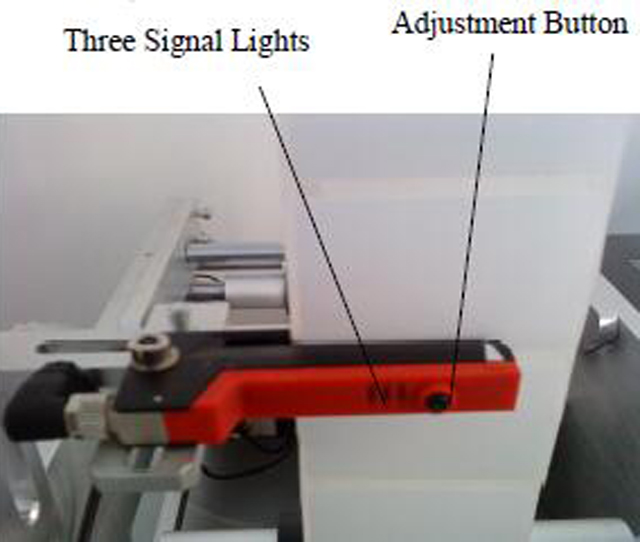
[German LEUZE GS-63 electric sensor]
Operation instruction of the electric sensor:
1) Drag labels to go through the U groove of the electric sensor as shown in the following fig..
2) Dragging labels, yellow signal light is on in the gap between labels and is off at the place with labels, so it is normal and can be used directly.
3).When yellow signal light is on or off all the times, reset the electric sensor.
4) Methods of setting up electric sensor are as follows:
- Drag labels through U-shaped groove as demonstrated in the following picture.
- Put the base paper with label into the groove of electric sensor, press the adjustment button for 3 seconds till yellow signal light blinking, then release button, put the base paper without label into the groove of electric sensor, press adjustment button for 8 seconds, then release the button.
Then the reset process is completed. - Drag the labels in the groove of electric sensor. The yellow signal light is off when base paper with label going through, and is on when gap between labels going through.
2.2 Product Detection Electric Sensor: (Only as model introduction, don’t represent real equipment type)
2.2.1 Connection of FX-301 Series electric sensor:
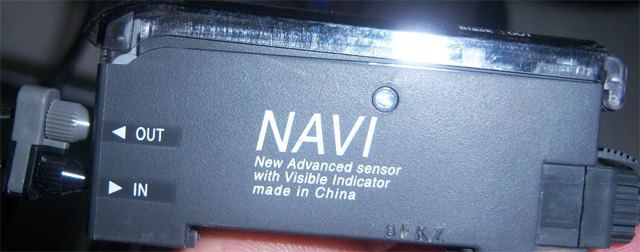
Product detection electric sensor only can be used via proper connection. Follow the connection instruction as below. ’in’ connects to black wire, and ’out’ connects silver wire. [FX-301 Series electric sensor]
2.2.2 Product detection electric sensor detecting principle
The product detection electric sensor identifies the object according to light reflection amount. Electric sensor emits the light to object, object can reflect certain light to electric sensor, when the amount of reflection light achieves to setting value, electric sensor signal changes and sends signal to control system.
2.2.3 Status switch
Press ‘mode/cancel’ key, green light switch with ’run’, ’teach’, ’ADJ’ ’L/D’ ’TIMER’ ’PRO’ several modes, indicating different work status.
’RUN’ means operation status;
’TEACH’ means teaching status;
’ADJ’ means adjustment status;
’L/D’ means Up/Down signal status;
Press down ’Push’ key for confirmation, toggling for fine-tuning function.
2.2.4 Product detection electric sensor setup
- When there is no product on the work station, open transparent cover of electric sensor amplifier, press ‘MODE/CANCEL’ key, and switch to ‘TEACH’ mode. Digital display window shows a value which is blank signal, as ‘67’ in the picture as below. When the value is stabilized, press ‘PUSH’ to confirm.
- Then put product on the labeling station, close to left positioning lever, observe position, and locate the position of label on the product via adjusting the positioning lever.
- After adjusting the position of label, a new value is on the digital display window which is the signal while detecting the products, like ‘1900’. If the value is stable, press ‘PUSH’ to confirm. After completing that, digital display shows the ‘GOOD’ tips. (Press ‘MODE/CANCEL’ key back to ‘RUN’ operation status).
- Switch to ‘ADJ’ model. Digital display shows the value=blank signal (detecting signal-blank signal)/2. System defaults this value as threshold value. If signal value is greater than threshold value, it means there is object in default, and less than threshold value, it means on object in default. Signal feedback to PLC. PLC will send corresponding command. Threshold value is adjustable. Via toggling the left/right key of ‘PUSH’, you can increase or decrease value, and change the threshold value (no adjustment required normally).Finally, press ‘PUSH’ to confirm.
- Press ‘MODE/CANCEL’ key, back to ‘RUN’ operation status. (Back to ‘RUN’ operation status after completing any settings.)
- Close the transparent cover and finish settings.
- When product is put on the labeling position, PRODUCT DETECTION electric sensor detects signal, and feeds back to PLC. PLC sends command and corresponding parts of labeling machine start to work.
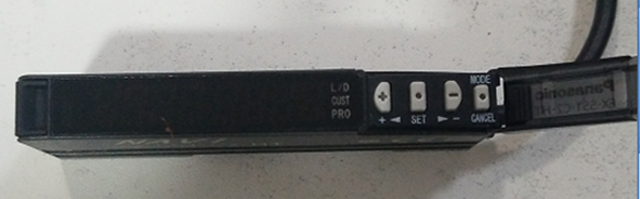
[FX-301 Series electric sensor]
Part Six Operation
I. Winding Label
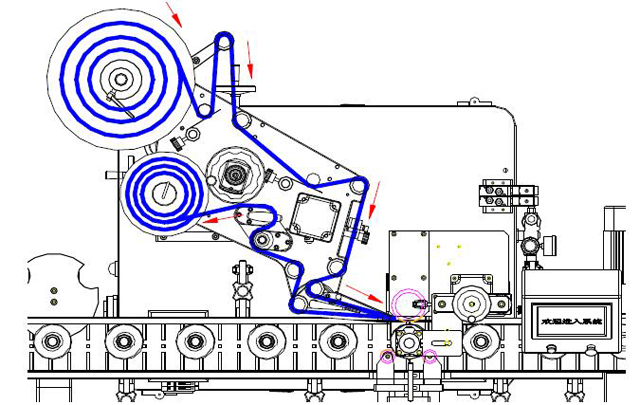
[Label winding picture]
- Loose the adjustable handle on the triangle material plate and take out the triangle plate;
- As indicated on the picture, put in the roll of labels, install the triangle material plate and tighten the handle.
- Turn the T shape handle on the traction mechanism for half a cycle in clockwise direction, loose the traction axis, and loose the manganese shims at the 2 places;
- Wind the label according to the direction indicated by the red arrow (pay attention to keep the whole label strip parallel without skew.). Press the manganese shim on the label strip slightly, and then turn the T shape handle on the traction mechanism for half a cycle in clockwise direction. If the label is pressed in position, label winding is finished.
II. Mechanical Operations
Mechanical operations run usually when the machine is powered on. Adjust in manual status in the assist of relative movements.
- Transportation mechanism: Adjust transportation mechanism to make sure products be transmitted to and sent out the labeling position successfully. Put products to be labeled on the 2 sides of the transportation mechanism for minor adjustment. Specific operation methods please refer to relative chapters in ‘Part Five Adjustment’. Adjustments of labeling position and material recycling position are using similar method.
- Labeling position adjustment: put products to be labeled under the label dispenser board, adjusting the labeling head up and down or forth and back, to ensure the label splitting position align with the label pasting position. Adjust guiding mechanism, to ensure the label pasting on the indicated position. Use above 2 methods integrally for adjustment.
III. Electrical operations
Connect power→ open 2 emergency switches; start labeling machine→ human-machine interface setup→start labeling.
Part Seven Routine Maintenance of Equipment
1. Equipment installation and operation environment:
Room temperature, not suitable to use in high temperature, humidity and acid-base environment for a long term to avoid the effects of shortening the operation lifetime, efficiency and precision.
2. Keep clean:
Clean the mechanism of the equipment after use, eg, friction roller, electrical box and etc. Alcohol or commercial neutral cleaning liquid could be used for cleaning and maintenance.
3. Attentions in cleaning:
- Do not use cleaning tools which may damage mechanical surface.
- Do not use erosive plastic container.
- Do not use acidic dissolution liquid.
- Periodic check and maintenance: check the machine periodically in order to keep the machine work well, including but not limited to followings:
- Clean out the discarded scraps of paper and debris.
- Clean out the oil residue from the side of the roller.
- Clean the lens of the sensor with soft brush or cloth.
- Replace fuse periodically. This equipment uses AC power and a fuse to prevent overload.
- Rustproof: Spray rustproof oil on stainless steel and iron parts and rub evenly with soft cloth.
- The recommended rustproof oil is rustproof oil.
Part Eight Settlement of Common Malfunctions trouble shooting tips:
1. Base Paper Broken:
The base paper broken is closely related to the quality of the base paper, scrapping the base paper in the label traction and label adhesion.
- Check the base paper damage, if it is cut down, change to base paper with better quality. The recommended paper is the Gelaxxindi, and requires the label supplier to control the depth of die cutting.
- Check the label scratching during winding to eliminate factor of scratching.
- If label adhesive, it is easily to be broken. Control the output length of the label, and ensure no adhesion to the labeled products.
2. Labeling deviation more than precision requirement:
- Label deviation and label strip off position, label strip direction not parallel with product transportation direction, traction wheel slipping, incorrect detection of product position, label not pasting on the product aligning with label pasting wheel, product tolerance and so on are the factors needed to be checked and be solved respectively.
- If label strip is off position, release the traction mechanism and drag the label back and forth to make it go correctly. After label going correctly, tighten the limit circles at 2 sides and guide out the label.
- If label strip direction not parallel with product transportation direction, adjust the inclination of the labeling head to realize parallelism.
- Traction wheel slipping and worn out relate to the clock screw on the traction wheel. The 2 problems can both be solved by tightening clocking screw.
- In product manufacturing process, edge tolerance causes labeling tolerance. Product tolerance can only be solved by product quality control.
3. Output label continually:
- Continuous and incomplete outputs of labels related with the detection sensitivity of the electric sensor and could be solved by adjusting sensitivity. Detail instructions refer to aforesaid chapter for electric eye adjustment.
- If it can not be solved after electric eye adjustment, it may be the reason that label is not in detection scope of the electric eye or it is damaged. Consult our company.
- Another reason is that the label strip is off position and is not detected by the electric eye. Adjust the detection position of the electric eye back and forth.
4. Base paper loose at the position of the label dispenser board
- Base paper loose relates to too low traction speed or traction mechanism slipping. If the traction speed is too low, speed up to solve it;
- If the traction mechanism slips, tighten locking screw on the traction axis until base paper not slipping.
- Additionally, pay attention to the transportation belt behind the material recycle shaft broken or not.
Service Commitment
VKPAK provides pre-sales and after sales service in the priority of customer.
- Provide professional pre-sales technical advice and guide customers to select proper models.
- Provide operation training of the labeling machine and guide customers to use and maintain the labeling machine properly.
- Provide technical support services to guide customers to solve the problem of labeling problems.
- One year equipment maintenance warranty provides maintenance services.
You May Like
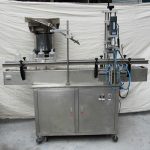
 Automatic Plastic Bottles Single Head Screw Capping Machine
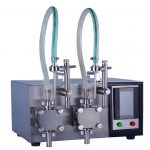
- Semi Automatic Gear Pump Pharmaceutical Liquid Filling Machine
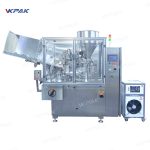
- Tube Filling And Sealing Machine For Plastic Laminated Tubes
- High Speed Rotary 8 Heads Capping Equipment For Pump Caps
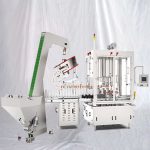
- Automatic 6 Head Piston Bottle Filling Capping Machine For Shampoo
- High Speed Horizontal Round Bottles Vials Syringes Labeling Equipment
- Automatic H Type Carton Case Top-Bottom Edge Folding Sealer Equipment
- Semi Automatic Power Cord Cable Wire Sticker Flag Labeller Machine
- Automatic Glass Red Wine Bottles Linear Filler Plugging Capping Line
- Automatic Flat Surface Bags Cards Paging Labelling Machine