- Apply label length: 10 mm~150 mm
- Apply the label width: 10 mm~150 mm
- Apply paper roll internal diameter: 40mm or 76mm
- The paper roll external diameter: φ≤250 mm
- Indoor temperature: -10° c ~40° c
- Indoor humidity: 35~85﹪
- Power supply: 220V,50HZ
- Overall dimension: 550*550*650 (L*W*H)
- Weight: 78kg
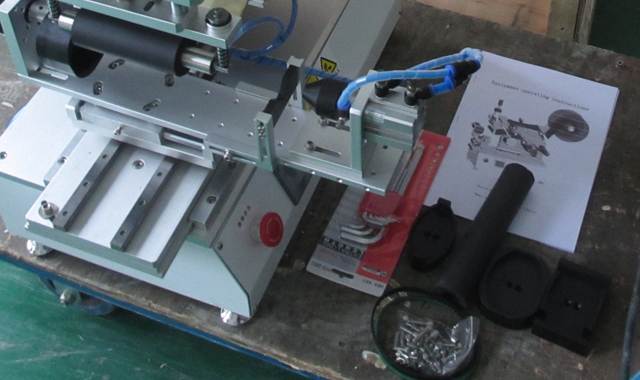
Equipment operating instructions on rolling labeling machine:
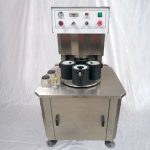
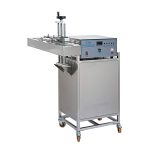
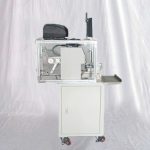
Device model:VK-T805
Name: semi-automatic flat & round bottles labeler machinery
Circumstance for operating the rolling labeling machine
1. Use this device is strictly prohibited in the following environments,
- Fierce local temperature change
- Where high humidity and dew
- Very strong vibrations or shocks
- Place in the dust
- Where the splash of water, oil, chemicals
- Where there are explosive, inflammable dangerous goods
2. Make sure the power outlet and the power supply interface can be in close contact or loose contacts may be resulting in a fire hazard.
3. Do not place heavy objects on the power cord and damaged power cord may cause electrical shock or fire hazard.
4. Before cleaning or in antirust oil, be sure to unplug the power cable from the device, otherwise in danger of fires and damage to equipment.
5. Do not use loose or damaged power outlet, or of electric shock and fire hazards.
6. Use the correct grounding, use is not properly grounded outlet will cause risk of electric shock and damage to equipment.
7. Do not wet the hand when touching the power outlet, or risk of electric shock.
8. When the mobile device, make sure the power cord from the power supply, or they risk of fires and damage to equipment.
9. At the right voltage/current standard using devices, without appropriate voltages / currents work will lead to the risk of electric shock, fire, or damage to your equipment.
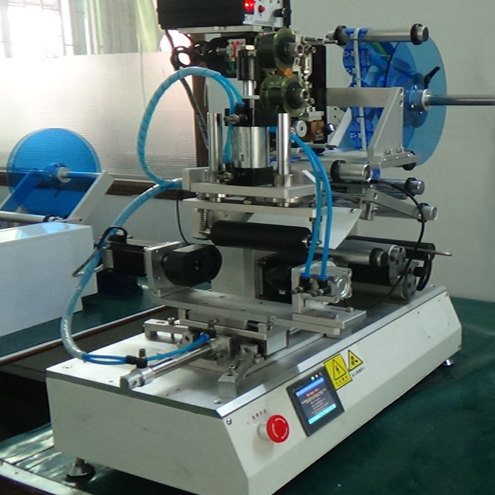
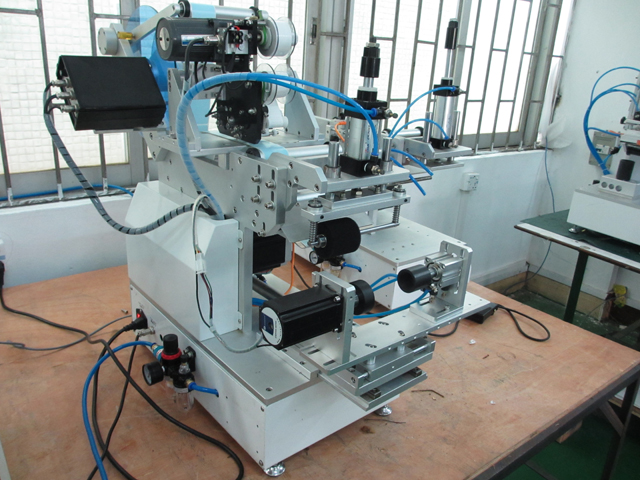
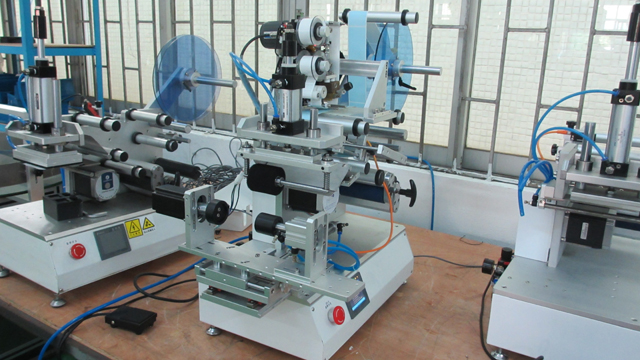
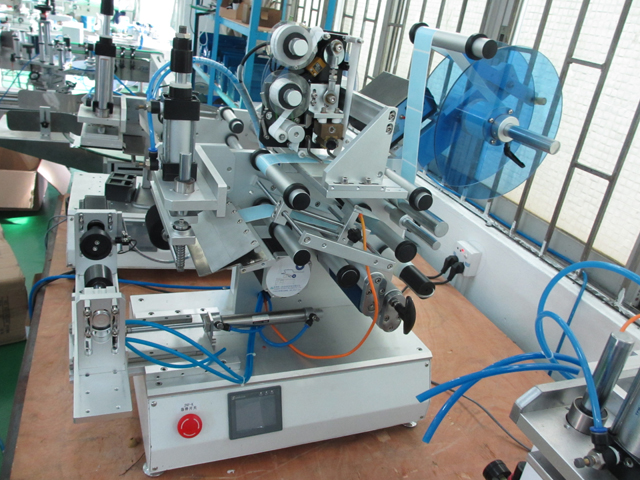
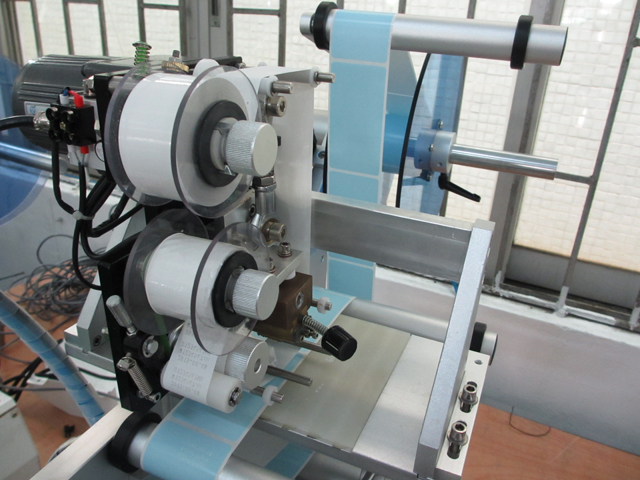
VK-T805 Labeling Machine
Labeling machine introduce
Labeling machine is automatically label affixed to the product surface the short name of an automation device, it can replace manual labeling, improve production efficiency and quality. According to the degree of automation can be divided into manual labeling machines, semi-automatic labeling machine and automatic labelling machines; according to the shape of the product can be divided into round bottle labeling machine, partial-around labeling machine and special-shaped bottle labeling machine; according to the labeling and product placement can be divided into vertical and horizontal labelling machines.
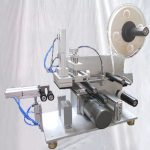
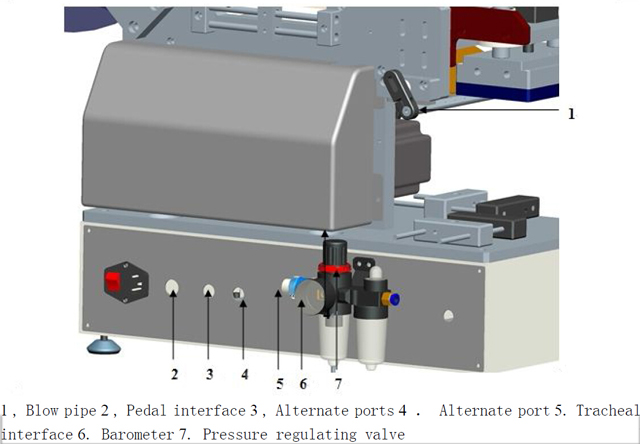
Drawing explanation on model VK-T805:
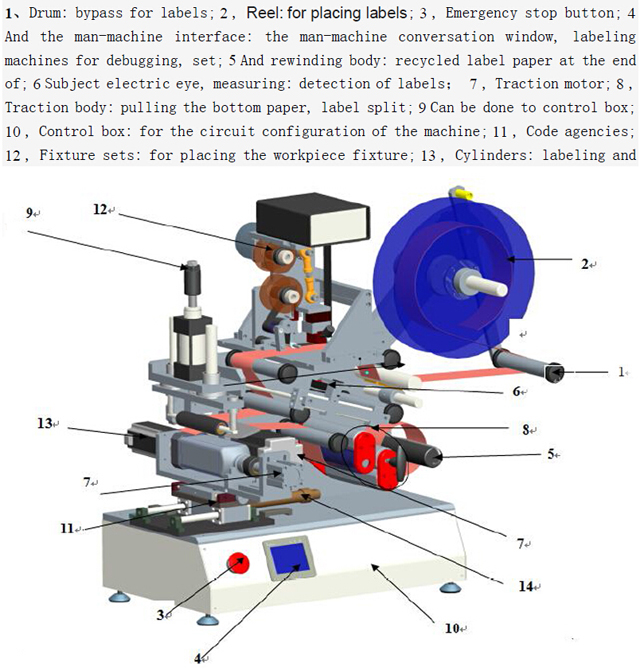
Back of machine
Technical parameters:
1. Apply label length: 10 mm~150 mm
2. Apply the label width: 10 mm~150 mm
3. Apply paper roll internal diameter: 40mm or 76mm
4. The paper roll external diameter: φ≤250 mm
5. Indoor temperature: -10° c ~40° c
6. Indoor humidity: 35~85﹪
7. Power supply: 220V, 50HZ
8. Overall dimension: 550*550*650 (L*W*H)
9. Weight: 78kg
The scope of
1. Widely used in food, pharmaceutical, cosmetics, cosmetic, electronic and other industries.
2. For semi-finished products or finished products in print and partial arc surface semi-automatic labeling.
3. It can label both flat or round or oval or other shapes of bottles see the samples pictures as below:
Labeling theory
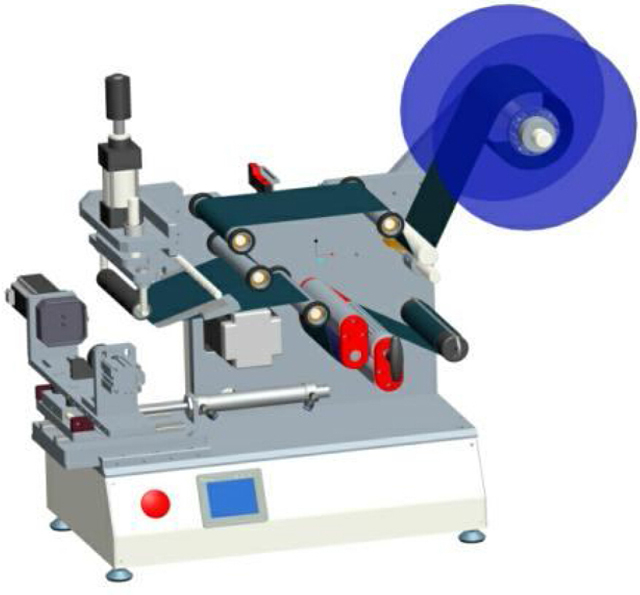
1. Transmission system: motor driven by timing belt drive system and receiving institutions, provide the impetus to the label split, thus achieving stripping and recycling paper at the end of the label.
2. Control system: this machine uses the electric and gas combination controls, electric eyes (sensors) and foot switch passes the received signal to PLC in central processor in accordance with set program for processing, thereby achieving stripping, sucking, editing labels and counting function.
Operational processes
Power on theInstall label corrected with adjustable electric eyelabel adjustment label
Power On / Shutdown
Power On:
1. Around the machine and cleaned, check for loose phenomenon.
2. Labeling and connect the power cord to the back of thepower supply socket, and switch next to the power socket is open.
3. Connect the other end of the power cord to the AC outlet, using voltage is 220V, 50Hz.
4. Emergency stop switch main panel to open
5. High pressure gas access into the hole (and confirm that the open switch)
Shutdown:
1. In the case of normal use, you can plug the power cord from the AC outlet or directly press the emergency stop switch.
Attention!!!
2. Do not plug the power cord or power supply in hand when wet contact, it will cause an electric shock.
3. Do not place heavy objects on the power cord.
Check adjustments
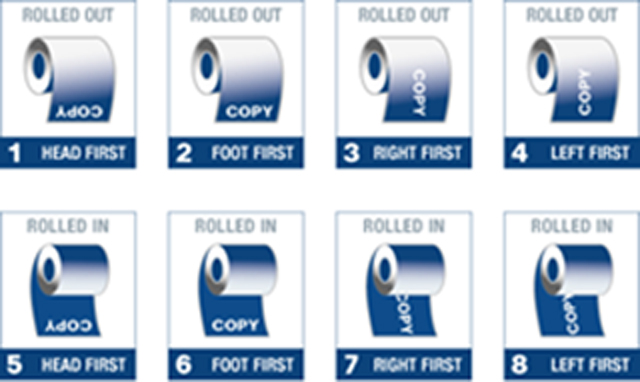
1. "1" labels around, depending on the label in that side of the volume, in volume within the surfaces follow the diagram bypass method.
2. "2" clamping body, round the buoy first release, after once again pressed.
3. With the naked eye observation, observation on the label after "5" at the Peel Board, tag being split out to be in the position of effective fractions of suction head, shown in the previous figure, If it is not correct, the label needs to be rough adjustment.
4. In the "3" and "4" service between the tags to detect electric eye, around long with label must be tested when magic eye slot hole in order to test electric eye can detect changes between the label and the label, electric eye for more sets see "electric eye settings" section.
5. After the end of "6" traction body, we must strictly in accordance with the "S" shape around the law and "T" handle to tightly marked with status, otherwise it would cause a bid not allowed or unable to pull the end of belt.
6. "7" for winding body, axis and round black steel clips for activities, the end of paper clip clamp.
Corrected
1. Upon completion of the above, on the panel "automatic / Manual" button to "manually" status, please make sure the power is connected and turned on, and then press the "jog" switch, traction pulling the bottom paper about 0.5 metres, is designed to give the bottom paper free and correct.
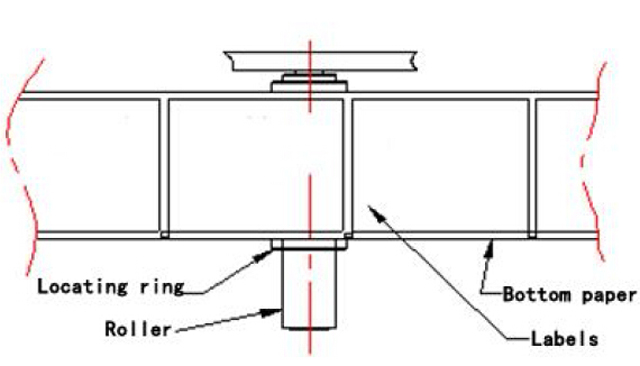
2. When the bottom paper automatically corrected, we will all adjust rollers on the limit circle, reference shown in the previous diagram, move the limit circle on both sides of the paper.
Move the electric eye
1. On the surface "Automatically / Manually" button to "manual", then press "jog" switch, this time with the naked eye observation of Peel Board, so labels out of the strip panels 0~1mm Can be.
2. Then move the label test electric eye, put between those tags and labels the end of paper, pay attention to test electric eye lights, when the detection electric eyes move from the label or from the end of paper labels, lights will toggle between the on and not on.
Dimensions in the above diagram, ensure the suction head is distance from the Strip panels 0.5~1 Mm, you can loosen the screws to adjust the
So that you can ensure a smooth transition to the suction head of the label position. (Typically, this position has adjusted well)
Attention!!!
1. Confirm pressing belt and locking devices reset, otherwise it will lead to a bid is not accurate.
2. Checks whether the test electric eye with, otherwise it would cause continuous label.
3. Inspect the drive system for clamping, otherwise it will result in no pulling the bottom paper.
Magic eye set
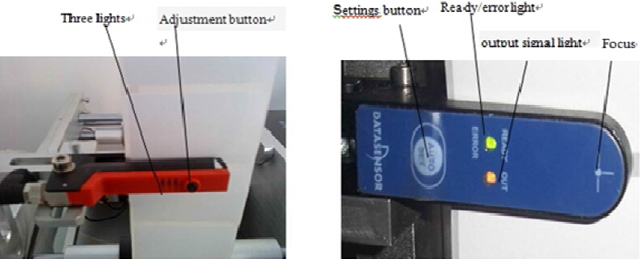
Mark electric eye (here are for illustration purposes only, and does not mean that customers purchased model configuration)
Left for Germany Dr easy logging GS-63 Electric eye, right for Italy pedicle SR21-IR Electric eye. They generally use to detect labels. Here is their adjusting methods
1, Dr easy logging GS-63 Electric eye adjustments:
Rationale: to identify the gaps between labels depending on the thickness. (Via light penetrates where there is no label and no penetration there are labels to identify) applies to a certain thickness of paper labels or other label
Knob instructions: Green lights: power light
Yellow light: to identify the status lights (Yellow light is lit, there is signal output)
Adjust button: adjusted for detection of labels with different settings
First of all labels through the magic eye like the following diagram: If you pull the labels, yellow lights in a gap between labels and label are lit, there's label is off, you can not reset, you can directly use. When the yellow light is solid or is often borne out by the case, you need to reset the electric eye. Set as follows: first, the labels shown through the magic eye of theu-shaped trough, there are labels placed electric eye inside the slot, press and hold adjust button for 3 seconds, you can see the electric eye flashing yellow lights, Then release the button, where there is no label (only label the end of paper) placed in the magic eye slot, press and hold adjust button for 8 seconds, and then release the button at this point, Setup is complete. Label electric eyes pull in a tank, you can see that there are labels yellow lights off, gap offices in label with the label, the yellow lights are lit.
Italy pedicle SR21-IR Electric eye adjustments:
Belonging to the Groove electric eye, through the amount of light penetrating the strength of discrimination have no labels, apply paper material and label material at the end of a different label.
Detection principle, Groove electric eye side fired light beams, to receive on the other side, when the intermediate labels, receives the amount of light change, by setting thresholds, there are no labels to identify.
Setting method
1) When "ready" When the lights, electric eye focus label in the Middle, pull the tags back and forth, such as changes to the output signal, electric eye is in working condition, can be used directly.
2) Short press the auto Setup button, green and yellow lights, electric eye catching medium signal, non-removable labels at this time, up until the green light quickly flashes.
3) When the green light flashing when media into second to magic eye focus location.
4) Short press "AUTO SET”.The green light is off. Electric eye catching the second type of media signals, non-removable labels at this time until the green light stays on.
5) Move the labels, in two local media decomposition, the output signal is lit, magic eye set.
6) "READY" Solid, magic eye to use an object you can switch two media.
Adjust the label position
1. First container in figure "C", And then try to stick, observation post locations and pass adjustment "A" And "B" Activities of the Office block, tuned to the appropriate location.
2. After adjusting the appropriate, activity seat screws need to be fixed, so as not to loose.
3. D Built-in test electric eye, used to test products for free. Through the box back on the pedal / Startup status of the measured object to adjust the labeling machine.
Manual operation
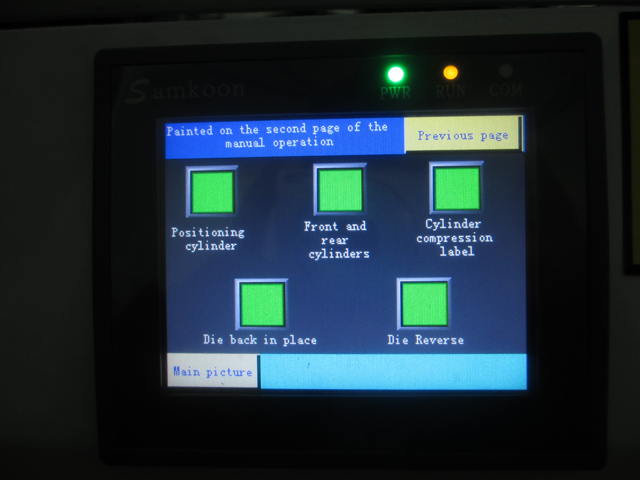
1. First of all, you want to "Manual / Automatic switch" in the manual, and then combined with "switch" to use.
2. Manual operation used for use when debugging, for correct labels
Automated actions
1. First of all, you want to "Manual / Automatic switch" is in the auto State, and then combined with the "foot switches".
2. Automated actions used for use when debugging, including marked and labeled.
Measuring electric eye adjustments:
1. FX-301 Series Electric eye is properly connected:
Magic eye must ensure that the correct installation of measurement can be used, connection method to connect as shown in the following figure, "in" continuous black line "out" even the silver line.
2. Electric eye detection principle:
Electric eyes according to the amount of light reflection to discern objects. Electric eye issue light objects, object will reflect a certain amount of light back eyes, when an object reflecting the amount of light that reaches the set value, the electric eye signal change, it signals to the control system.
3. Switch state:
"Mode/cancel" button, the green light in the "run", "teach", "ADJ", "L/D", "TIMER", "PRO" switch between several documents, indicating the different working status.
- "Run" represents the State run;
- "Teach" teaching status;
- "ADJ" to adjust status;
- "L/D" for lifting signal status;
- "PUSH" button down to confirm, left-right toggle to fine tune function.
4. Magic eye set:
4.1 On the premise of no product on the workstation, open electric eye amplifier with transparent cover, press "mode/cancel" key, transferred to "teach" document, digital box displays a value, this value will be an empty signal, numerical stability, according to "PUSH" to confirm.
4.2 Then place the product on the labeling station, close the left position, observing locations, by adjusting the position bar location to reach the position of the label on the product.
4.3 Label position when adjusted. Can see digital box that displays a numeric value, this value is when a product is detected signals, such as "1900", stabilized, click "PUSH" to confirm. When complete, digital display box shows GOOD tips. (You can press "mode/cancel" to return to the "run" can be a running)
4.4 Transferred to the "ADJ" document, displays the numerical display box = blank signal (heartbeat - blank signal)/2, the system default values for threshold, the signal value is greater than the critical value, it defaults to the object, is less than the critical value, the default is no object. Feedback signal to PLC, issue the appropriate directives. Thresholds can be adjusted through left-right toggle "PUSH" the left and right keys, increase or decrease in value, change the threshold. (Typically does not require adjusting) then press the "PUSH" to confirm.
4.5 "Mode/Cancel" key back to "run" the running state. (After Setup is complete for any return to "run" running status)
4.6 Close the transparent cover, set an end.
4.7 When the product is placed when the labeling station, electric eye on measuring signal is detected, feedback to the PLC, PLC issued a directive, labeling machine began its work-related parts.
The electronic control components
Control system
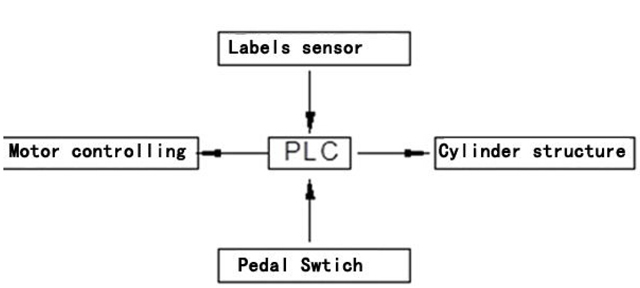
Principle: The labeling machine is based on PLC, which receives signals and controls the system. As shown in the figure above, when the "foot switch" is stepped on, the foot switch will start the signal to send to PLC, and PLC will process it according to the set program, and then start the "motor control system" to realize the process of stripping and feeding the label. At the same time, the "label position sensor" (also called the label measuring electric eye) will always pay attention to the distance the label travels. When it enters a distance for updating the label, the "label position sensor" will immediately send a signal to PLC. Similarly, PLC will process it according to the set program, and the "motor control system" will send a stop signal and start the label suction machine and labeling system to complete the stripping and pasting of the label.
Common faults and excluded
Labeling position unstable
1. Pressure equipment may not tightly, resulting in marked with loose, electric eye test inaccurate.
2. Traction body slipping or it is not tightly, resulting in smooth away the bottom paper.
3. Shape or positioning to stick.
Take away
1. Pressure belt devices too tight, causing marked away, pressure reduction.
2. In automatic operation is marked with without deviation rectifying and rectifies a back to.
Labeling quality is not good, there are bubbles or creasing
- The label may be too thin, suck sticking law does not apply to the soft, thin transparent labels
Equipment has no reaction
1. Confirm that the power lines, no problem.
2. Confirmed transmission outlet next to the fuses are intact, such as burnt out, replace the
3. May box loose internal wiring, repair professionals
Label paper at the end of the regular fracture
1. Pressure belt devices too tight, causing marked away, pressure reduction.
2. May label the end of poor quality paper, or deep in the teeth
Suction head failure or malfunctioning, off label behavior occurs
- Is suction head hole plug, causing insufficient suction (guarantee of pressure in 0.7Mpa above)
2. Blow pipe blowing direction is incorrect, can be adjusted by moving and rotating direction
3. Where there is no label covers, with a transparent adhesive seal, reduce the loss of suction
Continuous labels
Electric eye is not set well, resetting the electric eye
Collection of materials recycled paper at the end of loose
Mostly aging behind the drive belt, replace the new belt.
Label making
1. When producing labels, note direction round the buoy.
2. Ensure that the magic eye detection of foreign material hole, punching of paper the night cannot be left, otherwise unrecognized electric eye, causing duplicate labels.
3. Make sure that the label and the bottom paper smooth split open.
Routine maintenance
1. Under normal use, the equipment may be checked on a regular basis.
2. Equipment for dust control and anti-rust treatment on a regular basis.
3. Do not use for a long time, disconnect the power you want and do the maintenance work.
Annex
This labeling standard accessories: operating instructions, hex wrenches, electric eye adjustment screw driver.
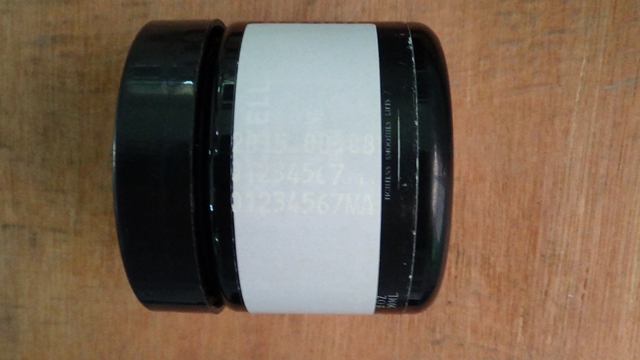
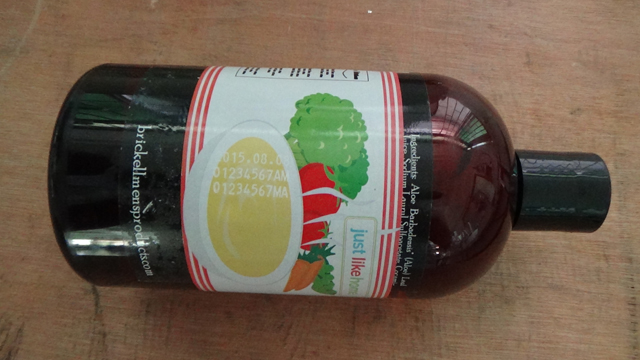
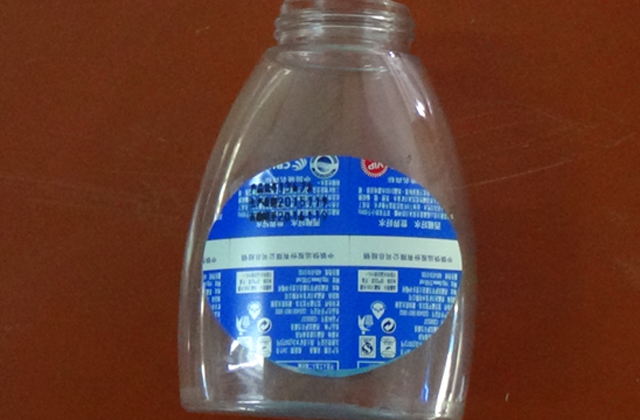
Labeling samples for different shapes of bottles :

You May Like
 Automatic Linear Servo Single Head Bottle Chuck Screw Capping Machine
- Manual Desktop Ultrasonic Plastic Soft Tube Sealing Cutting Machine
- Semi Automatic Lug Caps Glass Jars Bottles Chuck Vacuum Capping Machine
- Automatic 6 Head Piston Bottle Filling Capping Machine For Shampoo
- Automatic Electric Magnesis Aluminum Foil Induction Sealer Equipment
- Cable Wire Electric Wiring Tubes Flag Labeling Machine Semi Automatic
- Semi Automatic Cable Wire Sticker Print-Apply Folding Labeling Machine
- Automatic Three Heads Snack Food Jars Film Sealing Machine
- Automatic Inline Screw Capping Machine For Plastic Bottles
- Automatic Linear Metal Tin Aluminum Cans Sealer Seaming Machine